The battle isn’t AVR Atmega vs Microchip PIC anymore.. More and more people are moving to ARM chips. As easy as it sounds but it isn’t. ARM is an company that invented the ARM chips, but doesn’t has a silicon fab, instead they license the design to several silicon manufacturer like ST, NXP, xx and all those manufacturer put their own sauce and peripherals to the basic design. Nice to have such a large diversity, but when unfamiliar with ARM in general it is a bit overwhelming and hard to choose from. An other ‘problem’ is the vendors don’t offer a complete development kit to instantly start with their chips.
After browsing ebay for arm starterkits, STM32 seems to be a reasonable starting point as it appears to me most development boards are using this chip. ST doesn’t offer a development kit as I expected. so i try to find a more ‘generic’ development kit. After googling for a couple of hours I almost give up on this and wanted to stick with Microchip forever. I asked a bit round in my networks of ‘geeks’ and found everyone was struggling with this. Charles of paxinstruments.com pointed me into the direction of Eclipse. Eclipse is a general IDE with support throught plugins for various compilers and platforms. I tried to follow their installation guide found here.
I first started to download the ISO for ubuntu and installed that in a virtual machine (VM). I opted for a VM because you can easily throw away the machine or revert steps and Linux as this seems to be the de-facto standard for running GCC. Install Ubuntu 16.04 using the ISO and mostly the standard settings VMWare suggest except add 2GB of memory (remember the user and password you entered here) First thing is start after the installation is the terminal (windows-key and enter terminal [enter]) and update all packages with
$ sudo apt-get update
Next get into the desktop and open firefox the guide. First get the installation package of the toolchain from here. I used ‘gcc-arm-none-eabi-5_4-2016q2-20160622-linux.tar.bz2’ but newer versions will do fine I guess. Install to the ‘ default’ location using the terminal:
# install dependencies
$ sudo apt-get -y install lib32ncurses5
# install gcc to default path /usr/local
$ cd /usr/local
$ sudo tar xjf ~/Downloads/gcc-arm-none-eabi-5_4-2016q2-20160622-linux.tar.bz2
Check if it works:
$ /usr/local/gcc-arm-none-eabi-5_4-2016q2/bin/arm-none-eabi-gcc –version
arm-none-eabi-gcc (GNU Tools for ARM Embedded Processors) 5.4.1 20160609 (release) [ARM/embedded-5-branch revision 237715]
Copyright (C) 2015 Free Software Foundation, Inc.
This is free software; see the source for copying conditions. There is NO
warranty; not even for MERCHANTABILITY or FITNESS FOR A PARTICULAR PURPOSE.
I don’t have a J-link JTAG debugger or OpenOCD so I skipped the step for debugger now. I think it can omitted and later on installed if needed.
Next step is to install Qemu ARM plugin. Download the package from here (don’t want to compile from source so the latest binary was ‘gnuarmeclipse-qemu-debian64-2.4.50-201510290935-dev.tgz’) and install it:
$ sudo mkdir -p /opt/gnuarmeclipse
$ cd /opt/gnuarmeclipse
$ sudo tar xvf ~/Downloads/gnuarmeclipse-qemu-debian64-2.4.50-201510290935-dev.tgz
Check if the install was succesfull:
$ /opt/gnuarmeclipse/qemu/2.4.50-201510290935-dev/bin/qemu-system-gnuarmeclipse –version
GNU ARM Eclipse 64-bits QEMU emulator version 2.4.50
Copyright (c) 2003-2008 Fabrice Bellard
Eclipse does needs a Java runtime to operate. This command will install the default one on ubuntu:
$ sudo apt-get -y install default-jdk
Test the install:
$ java -version
openjdk version “1.8.0_91”
OpenJDK Runtime Environment (build 1.8.0_91-8u91-b14-0ubuntu4~16.04.1-b14)
OpenJDK 64-Bit Server VM (build 25.91-b14, mixed mode)
Now the exciting part is to install eclipse! The link in the howto didn’t point to an installable package but instead a nice installer. I choose the 64 bit download and got ‘eclipse-inst-linux64.tar.gz’. Extract it to a convieniant directory and run it:
$ mkdir ~/eclipse
$ cd ~/eclipse
$ tar -xsf ../Downloads/eclipse-inst-linux64.tar.gz
$ cd eclipse-installer
$ ./eclipse-inst
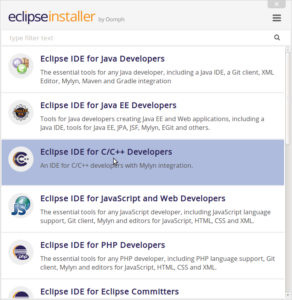
Here we are supposed to choose C/C++:
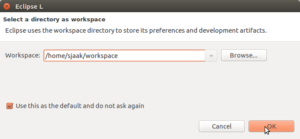
After installation choose ‘Launch`, and accept the default workspace location:
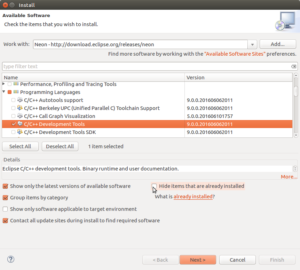
After the whole thing is started up, go to ‘Help’ then ‘Install new software’. I downloaded the ‘Neon’ so select the neon repository (this had me puzzled some time), also i needed to uncheck ‘Hide items that are already installed’ (puzzled me some time too). Locate the ‘Programming language’ and ‘C/C++ Development tools’ and click next (accept to install additional dependencies):
Now we got a working Eclipse environment, next is to install the armeclipse plug-ins. From the tutorial you can drag and drop the install link onto the eclipse desktop. I found it quite a juggle to drag and drop the link. Click on the install icon and hold the mouse button, at the same time use ALT+TAB to navigate to Eclipse and drop it somewhere.
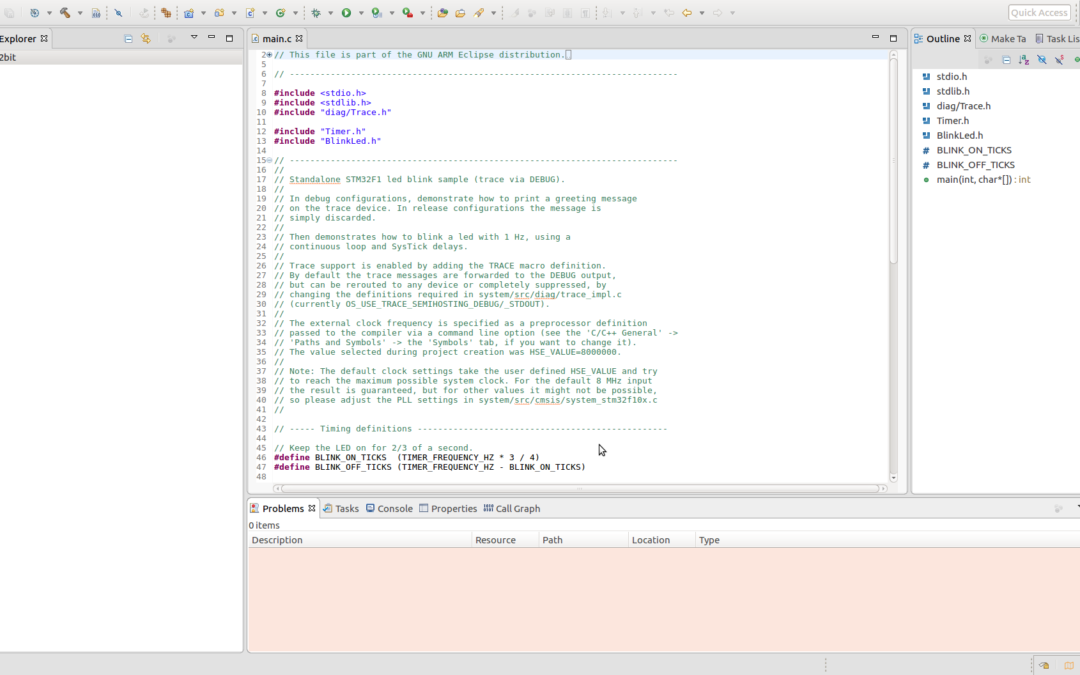
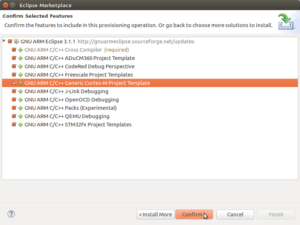
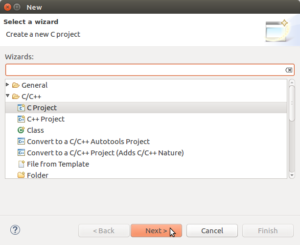
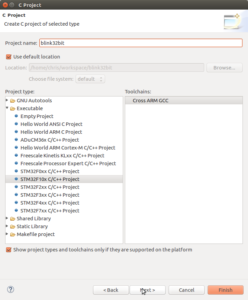
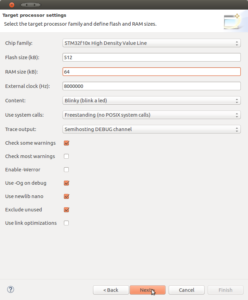
I just ticked every box, but probably I could get away with the default. I also got an error the software was not signed properly and ignored that (is this expected behavior?). Accept the licenses and let eclipse restart. Now we can start a new project with a STM32 as target:
Now you end up with a couple of source codes and it seems to compile. Now find a way to upload it into my STM32VET6 board 🙂


“ST doesn’t offer a development kit as I expected.”
— In fact, ST pioneered the way of cheap development kits with their Discovery and Nucleo boards.
I wasn’t referring to a development board, but a (free of charge) software development kit. I couldn’t find it some time ago, so I asked around for alternative solutions.
Sorry, now I understand. Thanks for your clarification. I am used to consider “development kit” to be some hardware. Software development kit is usually referred to as “SDK”.
Why don’t you use the SW4STM32 ???
The System Workbench toolchain, called SW4STM32, is a free multi-OS software development environment based on Eclipse, which supports the full range of STM32 microcontrollers and associated boards.
Look for atollic, they just released a size-code free version to develop arm32.
I had the exact same problem.
I got a Nucleo-F103RB board. Now what.. The CubeMX software actually lets you define input/output and peripehrals in a graphical environment (at lents you set all the ‘difficult’ registers such as clock scaling and uarts. Then you generate a framework project and specify one of 5 IDEs you want to use. The framework project is generated as a project in the selected IDE.
that, however, is on windows but it should be available for your platform as well
oh- and I chose to use the AC6 IDE. It’s also eclipse based, but at the time I started trying it out it was more free than any other
Try the mbed development environment for ARM. It’s supposed to be easy to use (I haven’t personally tried yet, but plan to soon) and supports the ST Nucleo boards.
https://developer.mbed.org/platforms/ST-Nucleo-F401RE/
Oops. Sorry, you said you had an F103-RB. I don’t think it actually matters for the IDE, but the link for that one is here:
https://developer.mbed.org/platforms/ST-Nucleo-F103RB/
Here is a list of free IDEs for STM32: http://www.emcu.it/STM32/What_should_I_use_to_develop_on_STM32/What_should_I_use_to_develop_on_STM32.html#Free_IDE_for_STM32
ST actually advertises a free IDE, although I haven’t tried it out. It’s not made by ST itself though: http://www.st.com/content/st_com/en/products/development-tools/software-development-tools/stm32-software-development-tools/stm32-ides/sw4stm32.html?sc=sw4stm32
Check out NXP. They offer a free eclipse based IDE for all 3 of the major platforms that bundles everything you need to develop. There dev boards can be had for around $25 and they work with OpenOCD using CMSIS-DAP protocol. The registered free version has a 256k code limit, but not many chips have that much flash anyway. You can download, install, and be stepping through the code of one of the many examples in 15 minutes. I’m not a big fan of eclipse (actually I hate it) but NXP has done a good job of packaging up a complete solution that works and installs very easily (at least on OSX – haven’t tried Linux or Win)
Atollic is free for compiling but you must pay $59/mo if you want debugging.
Another good option is Rowley Crossworks (again cross platform – though the UI looks a bit old). You can download for free with a 16k code limit. The personal license is really reasonable @ $150. Rowley supports virtually all vendors ARM chips with board support packages and works with many JTAG/SWD probes.
Book “Mastering STM32” by Carmine Noviello, get it.
Free dev env based on Eclipse – SW4STM32.
how about CooCox CoIDE?